Friday, April 20, 2012

Journeys - Organizing Vocabulary Materials

Here is a pictorial explanation of how I organized the vocabulary materials for our 4th grade teachers to use with the new Journeys program. Hope this post will be helpful. Here goes...


When we first received all of our materials, this is what we received (for vocabulary instruction)...
A yellow bin with sets of 5 vocabulary readers to go with each unit

A shrink-wrapped stack of the vocabulary cards (each unit has 10 cards)

A shrink-wrapped stack of lesson plans that go with each vocabulary reader book

FIRST: We got a 1/2" binder and slid in a cover sheet we made

We put each lesson plan in a sheet protector and put it in the binder (used 25 sheet protectors)

We put each set of 10 vocabulary cards in a small envelope and labeled them (used 25 envelopes)

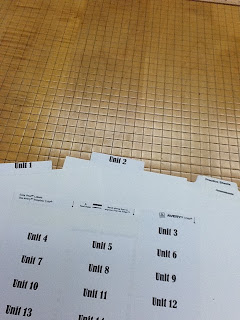
I found a bunch of random tabs in some old binders, but you could purchase new (used 25 tabs)
I cut the very bottom strip off to get rid of the 3-hole punches
I cut down the tab sheets to be 6 inches wide and discarded the part I cut off
I printed labels and stuck them over the top of the tabs to cover the old writing that was on them *Note: The labels were bigger than the tabs, so I cut the labels down before sticking them over the tabs

Here's a closer view of the tabs once I inserted them between the sets of books.
So here is what the finished kit looked like. We put the envelopes with the vocab cards in the back, separated each set of vocabulary readers with the tabs, and then slid the binder with the lesson plans in the side. Viola!


Wednesday, September 7, 2011

Guided Reading Kits

Last year for mentor meeting we made Guided Reading Kits for each of our mentees. Several people have asked me to share what we put in those kits, so this post is my attempt to explain the kit. If you need clarification, leave a comment on this post and I will respond. This is a picture of the finished kit. However, when we started our mentor meeting, we gave each person an empty shower caddy and then gave them the items for the kit one by one and explained how each thing could be used in a guided reading lesson. We also gave each person a cookie sheet and bag of magnetic letters (pans came in a 2-pack from the dollar store and magnetic letters also came from dollar store). We shared ideas for making and breaking words, doing quick sight word lessons, and also doing vocabulary activities.


We gave each person these laminated cards on a ring. On the back are prompts for supporting kids with the strategy listed on the front. This is something teachers can use as a reference for supporting kids while reading.


One of my pet peeves in guided reading is when children come to the back table and don't have a pencil, so we suggested having 10-12 sharpened pencils in the kit for kids to use. The pencils I use are colorful and fun and can only be used during guided reading. We also put a timer (for fluency practice), several sizes of sticky notes, white cover-up tape for interactive writing activities, and rubber bands.


The rubber bands can be used when teaching kids to stretch and sound out words. Students hold the rubber band between their fingers while they are reading and when they come to a word they don't know, they stretch the rubber band while also stretching out the sounds in the words to try and figure it out. These work well with struggling readers and give them something hands-on that reminds them to monitor meaning and at least ATTEMPT to figure out words. When using these, the teacher has to reinforce that the rubber bands are TOOLS for reading, NOT TOYS!


Each kit had a whiteboard and marker, but we didn't have enough $ to buy whiteboards, so we just had teachers use a whiteboard from their own classroom and put it in the kit. We gave them 3 colors of Expo marker and shared ideas for introducing vocabulary and doing word work on the white board. Some teachers put 5-6 whiteboards in their kit so that each child in the reading group could have one to work on.


These are retelling cards. We printed out the words, backed them on cardstock and laminated them. At the end of a guided reading session, the teacher can give each child a card and have them retell what happened in that part of the reading selection. Somebody (the character), Wanted (the plot), But (the conflict), Then (the solution), So (the resolution).


We also put sentence/word strips in the kit to use when introducing vocabulary or teaching sight words. Students could also write a sentence describing their reading selection on the strip. The colored overlay sheets are made from report covers that we cut in to strips. Some struggling readers benefit from a colored overlay (green and blue seem to work best) on the text while reading.


We made copies of several graphic organizers and put them in page protectors. The teacher can lead a discussion before or after reading and the organizer can be filled out by students. By using sheet protectors and Expo markers, the organizers can be used over and over.


We made a variety of spinners that can be used after reading to discuss story events.


We copied these mini-posters and put them in page protectors. These help students thoughtfully discuss story events after reading.


Each kit also included alphabet charts (these are available at the district office) and mini-posters that teach the fix-up strategies. We showed the mentees several ways to use the alphabet chart with their lower readers.


We gave each teacher a couple of different ideas for managing guided reading groups and talked about how to get EACH CHILD sharing and discussing ideas and how to deal with students who want to dominate the discussion. With the "Talking Star", only the person holding the star can be talking at that time. Everyone gets the star at least once. The "Helping Hand" (which is just a die cut) can be used in a variety of ways. For example, each child is given a hand and each time they share, they fold over one of the fingers. By the end of the disucssion, each child should have 2-3 fingers folded down. The teacher can decide how many times each child should share. You can also use it to help teach kids the "5 Finger Rule" when choosing a book.


Each mentee made a little set of "Lasso's". These are just pipe cleaners that we bent in to the shape of a lasso. When introducing vocabulary, you can have kids "lasso" the words by finding them on the page, reading them in context and then discussing what the words mean. This is a quick way to introduce vocabulary. The lassos can also be turned around, hooked on the figer and used to track print for struggling readers.


We gave everyone several laminated bookmarks to put in their kits, one for younger grades (What To Do When Stuck on a Word) and one for older grades (Using Fix-Up Strategies).


We gave each mentee a few reading "TOOLS (NOT TOYS!)". These are all things that can be used in younger grades for students who still need to track print or for students who often skip lines or loose their place. HOWEVER, we talked about the importance of getting kids to eventually track print with ONLY THEIR EYES and reinforced that good readers probably don't need to use a hand-held tracker while reading.


These are just a few of the spinners we made. After reading, kids can spin and then tell about what they read.


We also gave each mentee a glove and they put the little self-sticking velcro dots on each finger. We then gave them a set of laminated retelling chips. This works better in younger grades, but the teacher choose which chips to velcro on and then after reading, each child chooses a retelling chip and talks about that element of the story.


We also had the mentees make these retelling cubes (just made out of folded cardstock). One is a questioning cube, one is a story element cube and one is a comprehension strategy cube.


Put it all together and there you have it.... A guided reading kit!


Other items we like to keep in our kit include:


Scissors


Stickers


Sight Word Flash Cards


Lesson Plan Templates (in a folder)


Guided Reading Binder (see "Guided Reading Binder" post)


Anecdotal Note Waterfall (see "Guided Reading Binder" post)

Thursday, January 13, 2011

Metacognition: Thinking About Thinking

Thought Bubbles
Lesson Idea from "Comprehension Connection" by Tanny McGregor
What taught:
Metacognition means, thinking about your thinking. When we stop to think during reading, it helps us understand the text better. We can make our thinking visible by telling others what we are thinking while reading a book. This is called "Thinking Aloud". When we are thinking aloud we are being metacognitive.
How Taught:

1. Display the word metacognition on a word strip and discuss.
2. Show some examples of cartoons (Peanuts cartoons work great) and have the students examine the text "bubbles". Ask them if they notice anything different between the types of "bubbles" used. Explain that when characters in a cartoon are saying something, the text bubble has a triangular tail, but when the character is only thinking about something, there will be a series of small bubbles leading to the bigger bubble. This is so the reader can see what the character is thinking.

3. Tell the students that you will model how to read a book and then "think aloud" about what you are thinking. Using a premade "Thought Bubble" begin to read a story aloud to the students, then stop every few pages, put your face in to the thought bubble and tell the students what you are thinking. They will giggle at first, but will also get the point and want to use the thought bubble themselves later.

4. As you choose the book to read aloud, be sure to use a good thought-provoking story. A couple of my favorites are Fly Away Home by Eve Bunting and An Angel for Solomon Singer by Cynthia Rylant. With younger students I sometimes use the book Roxaboxen by Barbara Cooney. For older students I like How Many Days to America by Eve Bunting or The Butterfly by Patricia Polacco.


5. After you have modeled the use of the thought bubble for part of the story, invite students to come up and share their thinking for the rest of the story. You could even use this again the next day with another story to give the students more practice.
How Evaluated
To evaluate the use of this strategy, you can use this metacognition worksheet. Students either listen to or read a story and stop at designated points to write about what they are thinking in the thought bubbles.

Thursday, September 2, 2010

W.Workshop in a Nutshell (Day 1)

When I was Little by Jamie Lee Curtis (Option 1 - younger grades)
All the Places to Love by Patricia Maclachlan (Option 2 - older grades)


Basic Outline:
• I gather students at the rug and introduce the writing block. I tell them that for the rest of the year they will spend time writing each day – it will become our favorite part of the day. Just like the authors of all of the books on our bookshelves, THEY will become authors!
• I then share a favorite book to launch the mini-lesson. My favorites are: “When I Was Little” by Jamie Lee Curtis (I talk about how they are growing up and already have a lot of memories and fun experiences they can write about) OR “All the Places to Love” by Patricia Maclachlan (we talk about things we love; people, places, hobbies, activities, etc .)
• On a piece of chart paper I draw a web and model writing my name in the center. I explain that I am going to brainstorm things that I could write about. In one circle I write/draw about family and friends. In another I write/draw about my favorite places and in another my favorite hobbies. In yet another, I write/draw about items that are important to me (my running shoes, a stuffed bear, my scrapbooks) and in another I draw a bandaid and write about “boo boo’s” I’ve had (stitches, broken bones, etc). In the final circle I draw/write about the culture of living in my family. For example; if you were in my family you’d have to be a basketball fanatic (GO JAZZ!), and love watching Nascar. You’d also have to like scones because we make them every Sunday.
• When I use All the Places to Love, I do a heart map instead of a web. It is a photocopy of a big heart and the students record important things inside it – people they love, places they love, sports they love, things the love to do, music they love, etc. (same concept as the web, just a different format). This idea comes from "Lessons That Change Writer's" by Nancy Atwell.
• I send students back to their desks with their own web (or heart map). The students spend the last 10 minutes or so filling out their own web. I walk around and put star stickers on the papers of those who are busy writing and help those who seem to be stuck. It is really important at the beginning to set up management with a lot of positive praise and feedback. I really stick to the expectation that students are quietly writing (NO TALKING!). I tell the students that during writing time the only thing I should hear are their pencils scratching the paper.
• As the block comes to an end, I introduce the students to their writing folder and teach them how to store their work and put the folders away each day.

Thursday, August 19, 2010

First Days of School

Here are a few fun ideas that you can use as fillers during these first few days/weeks of school.

TIME CAPSULE

Have each child bring a Pringles can and decorate the outside, creating a time capsule. They can then fill the time capsule with a handwriting sample, a tracing of their hand, a piece of string that's as tall as they are, a self portrait (or actual picture), a list of their favorite things (favorite music, movies, sports, hobbies) etc. The kids then seal their time capsules and "bury" them somewhere (which might be just in a cupboard in the classroom). Time capsules can then be opened at the end of the school year. You could also just have a single class time capsule and just have the students put one thing in it (such as a letter to themselves or an "All About Me" sheet. That way you only have to deal with one time capsule instead of 25.

CLASS QUILT

Give each child a square sheet of white paper (5x5, or 8x8) and have them decorate it with their name, drawings of their family, drawings of their favorite things, etc. Punch a hole in the corners of each sheet of paper and then tie the papers together with yarn to create a large class quilt that can be displayed in the classroom or hallway. The teacher would want to model how to do this or create a quilt square prior to the lesson. A fun story that goes along with this is "The Rag Coat" by Lauren Mills. It is in the 4th grade literacy place book "Chapter by Chapter" if you need a copy.

SUMMER REFLECTIONS OR SHADES OF SUMMER

This is an easy activity that students enjoy doing, which also serves as a chance for the teacher to get a quick indication of students' writing abilities.
Each student draws a large pair of sunglasses. In the sunglasses, the student draws something he or she did over the summer...a trip, activity, etc. They then attach a paragraph about what is reflected in the sunglasses. This is an opportunity to get an early writing sample and also makes an instant bulletin board! You could also do the same thing using a picture of a windowpane and call it "View From My Window".

ME Bags or Boxes

A tried and true lesson idea for the first days of school is to put items in a bag or box that represent you (the teacher). For example, a picture of your family, a pair of running shoes because you like to run, a whisk because you like to cook, etc. You can then send home a small bag or box with each student and have them fill it with their favorite things. Throughout the rest of the week you let students take turns sharing their "ME" boxes.

Sticker Partners

Each student is given a sticker to put on his or her hand upon entering the classroom, but students aren't told what the sticker is for until the time is right! Be sure there is a partner (matching sticker) for every student. Ask students to find their partners and interview them (name, grade, hobbies, etc.). Each interviewer is responsible for introducing each interviewee to the rest of the class. You might find that students find it less threatening when someone else shares information about them than when they are asked to share about themselves.

Paper Dolls!
Cut out paper doll shapes from cardstock. All are alike in the beginning. Then students "dress" their dolls by coloring or making clothes out of fabric, wallpaper, etc. Tell them to leave the face portion blank. Use the digital camera to take pictures of the students. Crop the pictures so that you see only faces, blow them up to fit the paper dolls, cut them out and glue them on. Students and parents love them! At the end of the year, students take their dolls home.

The Me Shield
For this activity, we use a copy of a banner from a Red Cross education program, drawn like a shield and divided into four sections. We pose seven questions students can answer about themselves:

What are three things you are good at?
What do you like most about your family?
What do your friends like about you?
What do you think you can do better than almost anyone else your age?
What do you dream about doing one day?
What is something you have already done that makes you feel really good?
What is one thing you are planning to change about yourself so you will be even better?
Each student writes his or her name at the top of the paper and answers four of the seven questions, one answer per section, on the banner. Students can write their answers or use a combination of art and writing to express themselves. The students volunteer to share their banners, and the teacher can proudly display them after the students have had a chance to decorate them.

Brag, Brag, Brag!

The first day of school is fast approaching. You have all worked so hard to get your rooms up and ready. I am SO PROUD! I wanted to post pictures of your rooms here for two reasons. First, so that you will be able to look back at the end of the year and remember what your room looked like before the kids "invaded" it (while everything is still so nice and organized), and second so that we can share your great ideas with others.